PART TWO (the pink rose)
by Marci Blattenberger
|
PART TWO (the pink rose) by Marci Blattenberger |
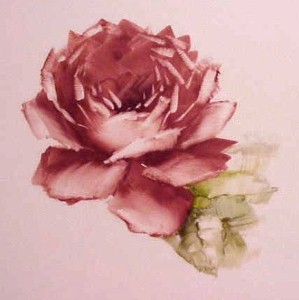
| This is a repeat of the lesson with the yellow rose without the cup and saucer drawing underlay and in a deeper color to make the cuts more dramatic and easier to see. The text is not as in-depth as the first lesson, so you may want to refer back to that lesson for details. | |
 |
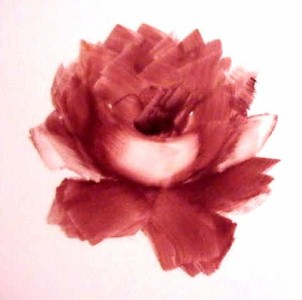
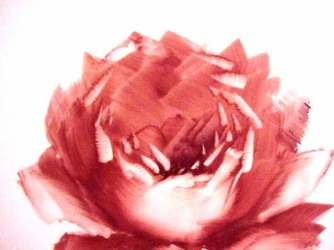
I used Warm Shadow for this rose which is a portrait color...but you can get a similar effect with violet of iron with either some blood red or pompadour added. Paint in the bowl....I did this in two curved strokes....Turn the piece upside-down and fluff in irregular strokes around the top of the bowl. No rounded strokes....make them irregular and jagged.... Pick up some deeper color on your brush and fluff in the heart of the bowl (Don't overwork)....Blot dark paint off of your brush and lightly blend the area where the top petals meet the bowl heart petals. ...Paint in side petals starting about 1/3 from top of bowl...vary the placement of these petals and the size and shape.( Avoid the"ears" or "cup handle" look)...When I painted in the right side petal, I picked up some darker paint on the edge of my brush so that when I made the stroke, it is deeper under the bowl. This adds depth. |
 |
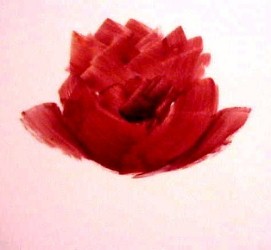
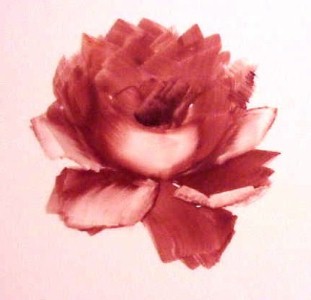
Paint in the rest of the bottom petals, avoiding a rounded look...Make the petals angular. |
 |
Wipe out strong highlight in center of bowl with turp brush. I don't completely wipe out an entire side of the bowl, just the center. |
 |
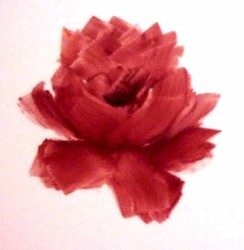
Using a shoveling or pushing motion, cut out a highlight at the edge of the petal. Start on the petal, slightly shy of the edge and scoop the paint toward the edge of the petal. Oil the brush lightly and soften the stroke, pulling toward the bowl with a little more pressure on the bottom edge. |
 |
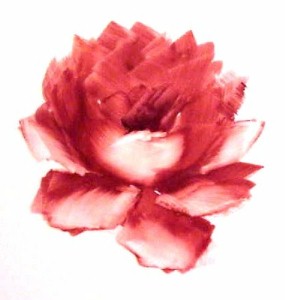
Remember that the bottom petals overlap each other like staggered bricks and if you draw an imaginary line from the edge of the petal, it should end up at the point where the stem attaches. In the picture on the left, I sketched in the petal edges with a wipe-out tool so you can see both the overlap and how the edges end up at the stem point. |
 |
Petal on the right shows the sharp highlight created with the scooping/shoveling motion of the turp brush. Petal on the left shows the petal softened with a lightly oiled brush, creating the mid-value areas. |
 |
Highlight wiped out of bottom petal using the scooping, then softening technique described above. Note how the scooping/shoveling motion has created interesting little paint build-ups on the petal edges. |
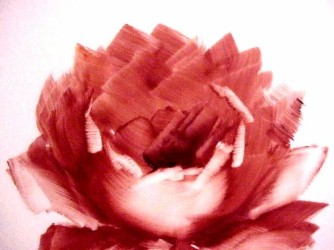 |
Wipe out bowl petals using the scooping motion...Vary pressure on the brush as you do this and you will get nice little thick and thin petal edges that look like rollbacks. |
 |
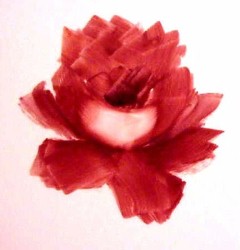
Continue cutting petals around the rim of the bowl, varying the width and length of the cuts...Add a few cuts on an inside row and a few to the heart of the bowl. |
|
Pull down and soften a few of the strong cuts at the top of the bowl. (Don't overdo)...and if desired, Cut a foreshortened petal across the bowl. (Strong curved cut across the bowl lightly pulled out toward the outside ) |
|
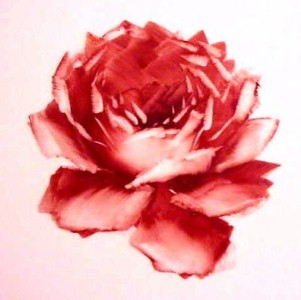
DONE! (Next fire will add washes of light color in the highlight areas, greyed washes in some of the mid-value areas and shadows...and a little more depth in the shadows as needed. )
|
|
CLICK HERE to go back to the ON-LINE LESSONS PAGE CLICK HERE to go back to the PPIO HOME PAGE *on-line lessons and lesson pages are the property of PPIO and the contributing artists and may not be reproduced for distribution without permission from PPIO |