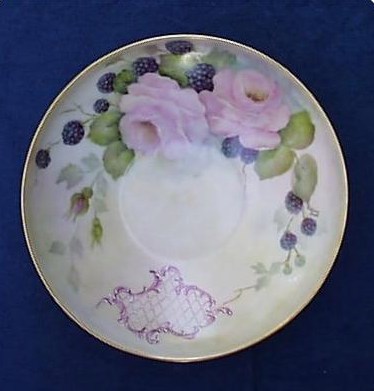
LEFT: Bowl with Roses and Berries- donated to Hospice of Peel
BELOW: Daisies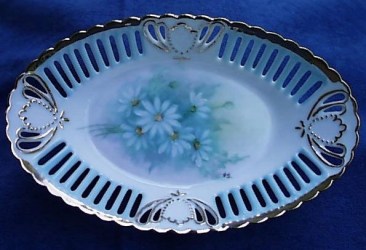
|
A BEGINNERS LESSON
by Patricia Burt |
|
LEFT: Bowl with Roses and Berries- donated to Hospice of Peel BELOW: Daisies |
Porcelain painting is an art which evolved in China during the ninth century with the discovery of porcelain. Today and since the eighteenth century, hand painting has declined in the old European factories, giving way to printed or stamped pieces which can be reproduced inexpensively. Independent decorators continued the art and it was in 1873 that china painting began in America. The first exhibit of hand-painted china in America was in Cincinnati on 25th May 1875. It has continued in popularity and is practiced by many all over the world today. China paints are composed of colour pigments mixed with a glaze medium and flux. Although mixed with oil the colours are transparent, applied in layers, working from light to dark values and firing between each painting session until the desired depth of colour is achieved. When fired from 1330 to 1530 degrees Fahrenheit (depending on the metallic oxide) the colours become vitreous and merge with the glaze becoming part of the porcelain. China paint, known as overglaze paint, is finely ground powder and must be mixed with a medium to render it suitable for a brush application. Any one of a number of oils may be used as the medium, the most popular is a mixture composed of balsam of copaiba, lavender and clove oil. Like other artists, porcelain painters seek inspiration from nature, taking photographs, sketching and working out their designs on paper before transferring their feelings and artistry to decorative objects or porcelain canvases.
PALETTE:- A covered
container with a tight lid and a piece of glass to fit inside, on which
to place the mixed paints. NOTE:- Whilst I have mentioned Rynne's paints, they are
not essential but are colours I like to work with. MEDIUM:-
An all-purpose oil for painting and mixing. (Mineral oil may be used for
mixing, it keeps the paints quite creamy and does not tend to dry out
as quickly.) A small glass jar to hold the painting oil is necessary.
Take a small amount of the powder and place on the tile with a medicine dropper and add a few drops of oil. With the palette knife mix well until a smooth consistency is obtained. Be sure to grind well so that the paint is not gritty. Some paints are grittier than others and care must be taken to get them smooth. Place this mixed paint onto a clean palette and identify the colour. CLEANLINESS:- This is a MUST in china painting... the oils used to mix and apply china paint tend to attract dust and lint, which if allowed to settle on freshly painted china may cause specks and spots that cannot be covered or removed once the china has been fired. The palette and oil jar should be covered when not in use to keep them free from dust and lint. Brushes should be cleaned after each painting session and can be conditioned occasionally in baby oil. The work area should also be kept clean and uncluttered. LOADING THE BRUSH:- Learning to load the brush with paint is very important. If the paint used is too thick, it will make the brush difficult to handle and if too thin, it will cause the bristles to separate. Keep the bristles of the square shader brushes flat and square. Don't forget to condition and shape them occasionally and always store them this way. Place a small pile of paint onto a tile and flatten a little from the bottom edge with the palette knife. Load the brush with a flat stroke, pull down the paint and lightly wriggle the tip of the brush in the paint. The paint should be all the way across the brush and about 1/4" up into the bristles and to corner load, push either to the left or right. BRUSH STROKES:- Always use as large a brush as possible to avoid using too many small strokes. Use a full brush load of paint for all applications including filtering, straight lines, flat surfaces, curves and dots etc. Always paint, bringing the brush towards you. NOTE:- To do this, you must continually be turning your piece of china. There are about 5 basic strokes with which you can make almost any effect. 1 Flat straight stroke 2 Left "C" stroke 3 Right "C" stroke 4 Dash ---- (make stems or twigs) 5 Dots .......(done with the corner of the brush) Practice using the brush and making these fine strokes until they are easy to do.
METHOD:- If you are satisfied with a slight, steady progress you will probably advance ahead of those who strive to do complicated work before they are ready for it. Remember.....Patience, Patience, Patience............ Good Luck & Happy Painting! |
|
CLICK HERE to go back to the ON-LINE LESSONS PAGE CLICK HERE to go back to the PPIO HOME PAGE *on-line lessons and lesson pages are the property of PPIO and the contributing artists and may not be reproduced for distribution without permission from PPIO |
|
|
|
Page design by Marci Blattenberger for Porcelain Painters International Online |