Forget-me-Not Plate
Second Fire
by Marci Blattenberger
click here to send email to marci
|
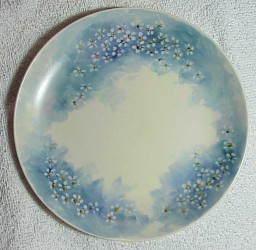
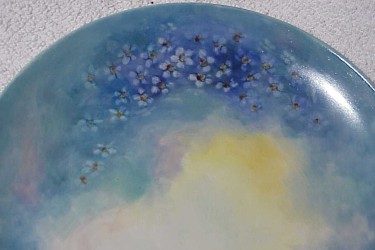
The picture on the left shows what the first fire on the forget-me-not plate looks like after having been fired to a cone 015. Lightly sand the piece using either a sanding sponge or a piece of fine sandpaper rubbed against itself to remove any potentially scratchy grit. |
 |
| Add a little yellow and yellow brown toward the inside of the piece and also add a little pink, American Beauty or purple in a few spots ...the pink or purples add a nice warm eye relief from all the blue on the piece.. |
|
|
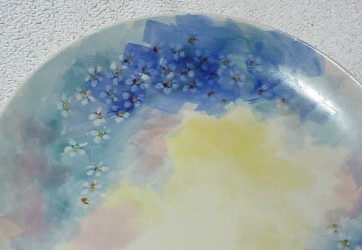
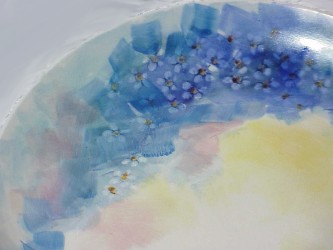
Add some strokes of deep blue in the center area of each of the 3 groupings of flowers (I used Rosebud's Cobalt Blue*See PPIOs catalog pages for Rosebuds Paints)...In this photo, you can see how washing the deep blue over the already painted flowers adds depth by darkening the flowers and making them appear to receed into the background. |
 |
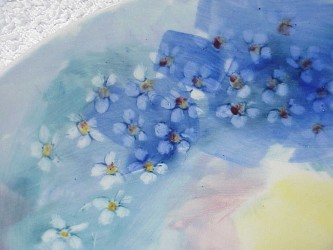
| Here is a close-up of the dark blue wash. You can see how , even though I applied a substantial amount of color over the first fire, you can still see the first fire.(and the second layer of paint becomes even more translucent after firing.)It is this color over color layering that gives china painting its unique beauty.) |
 |
| Now add some medium value blue. I like to make this blue a slightly greener blue. (I used Rosebud's Bluebell on this piece.)This medium value should go along the outer edges of the flower groupings and up to the edge of the plate in some spots. |
 |
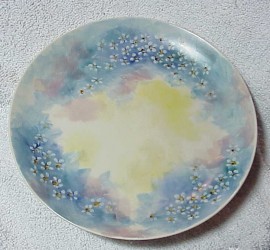
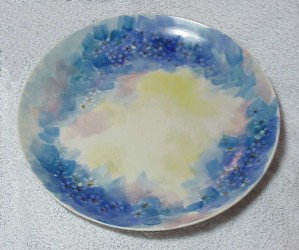
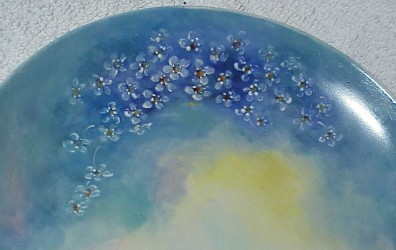
| This picture shows the entire piece with the yellow/yellow brown ,pink/purple and the two blue washes . |
 |
| Next, I washed over the remaining areas with a very light bluish green (you can use Water green...I mixed mine using Bluebell, White and a touch of green).Add more of this light blue mixture to your brush and smooth out all the brushstrokes, being very careful in the areas where the yellow meets the blue so you dont get a green. |
 |
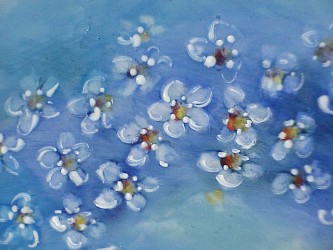
| This photo shows a close-up of the blended brushstrokes . Notice how the colors seems to melt into each other. |
 |
|
Next, pick up either a small square shader ( #2 or 3) or a cat's tongue brush or a berry brush (also known as a round),dip it turp, press out all the turp from the brush onto a paper towel (the tendency is to want to pull your finger along the brush bristles as you do this. Instead, press the brush into the towel using your finger.Pulling your finger along the brush hairs will eventually pull out hairs)
|
 |
| Make sure the brush is well blotted. If it is wet with turp, it will make the paint run.Oil the brush lightly and blot again. Then, picking out ONLY the main flowers from the flower groupings, wipe out the color from the petals and center. Then , without cleaning your brush (you want to have some paint accumulated at this point so you arent wiping these next flowers down to the original white of the china), wipe out some petals on the surrounding flowers..DONT OVERDO this.You want to leave a lot of the color you just applied to the petals so just pick out a few flowers and petals to wipe out. As you get toward the outer edges of the groupings, wipe out only a few centers...but again, take care that you dont wipe out EVERY center of every flower.Leave some covered with the blue wash. This is what will make them appear to receed into the background of the piece and add dimension and mystery...If needed, clean the brush and add a touch more yellow or yellow brown to the centers of the flowers and a spot of red to one side of the centers .... |
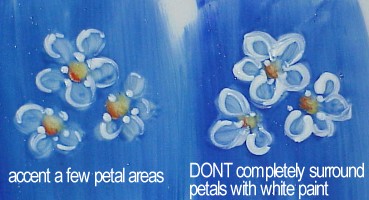
| Next, using either white china paint, Jean Beebe's White Lace(*See the PPIO catalog pages for Jean Beebes products) or base for gold mixed with a little oil (you can also use enamel but it tends to chip) and a fine scroller, add some white accents to a few petal edges. DONT OVERDO THIS. |
 |
| DONT completely surround a petal with white. You want to accent , NOT outline. and DONT outline EVERY petal. You should have a variety of strokes and the flowers that are on the very outside edges of the piece should have NO petal accenting at all.(The farther back a flower is , the less detail you will see). |
 |
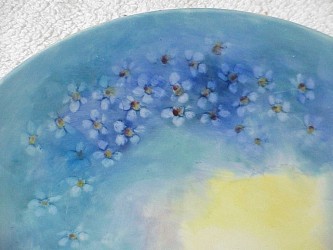
| With the same white, add five small dots to the center of each flower. Again, notice that not all of the flowers have 5 dots...MOST do, but some have 2, 3 or 4....and some that I want to push far into the background have none at all... |
 |
|
NOTE: If youre nervous about working wet on wet to apply the white accents, you can fire the piece to a cone 015 first and then apply the white accents on the next fire. This is entirely up to you. We are nearly finished with this fire. Wrap a piece of tissue around your finger and carefully wipe it around the rim of the piece to give it a nice, clean edge. Carefully check the back of the piece for paint smudges and clean them off. Fire the piece at a cone 015.
|
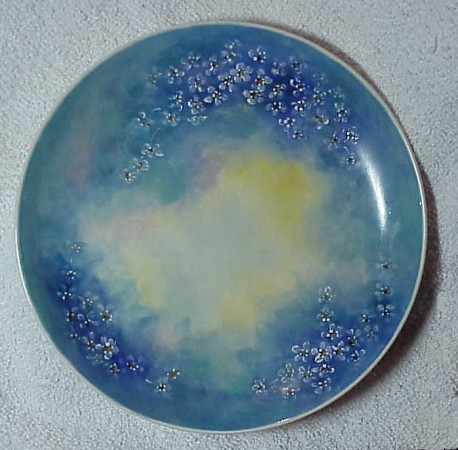
|
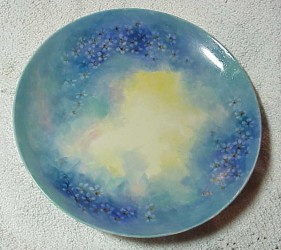
This is what the piece should look like at this point. I will be adding one more fire to the piece. We will add some scrollwork to tie the design together and to provide a better visual flow between the flower groupings. We could do this now and eliminate the need for another fire, but with scrollwork, its easier to fire the piece and then work the scrolls in another firing, |
 |
|
This gives you the ability to wipe off the scrolls without damaging the painting if youre not happy with the flow of the scrolls and allows you to experiment with the scroll placement. ONE MORE FIRING TO GO! If you have any questions, feel free to email me at the link at the top of this lesson page.I hope youre enjoying this so far...............................Marci |
|
|
|
*On-Line lessons and lesson pages are the property of PPIO Page Design by Marci |