Yorkies

by Marci Blattenberger

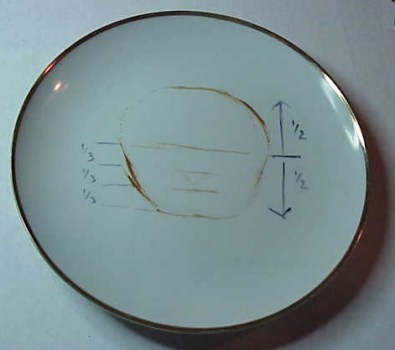
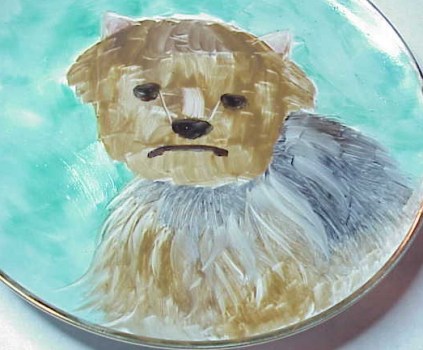
I've had several requests to do a step-by-step of a Yorkie so here is a simple study. It is best if you work from a photograph and in that case, you'll be altering your painting to reflect the actual colors of that dog..and the actual hairstyle...since Yorkies are trimmed according to their owners individual taste.

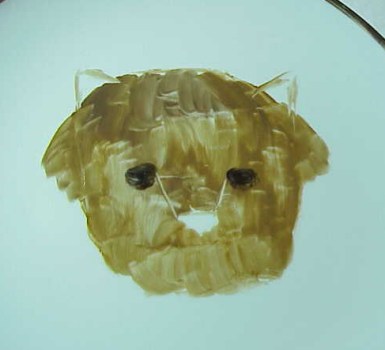
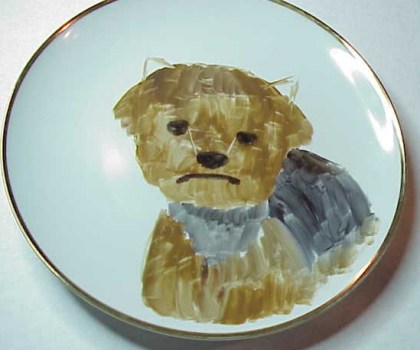
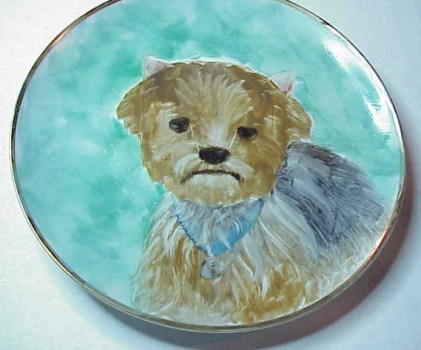
This particular Yorkie is a little sweetie of a puppy name Fishbait Chapman.

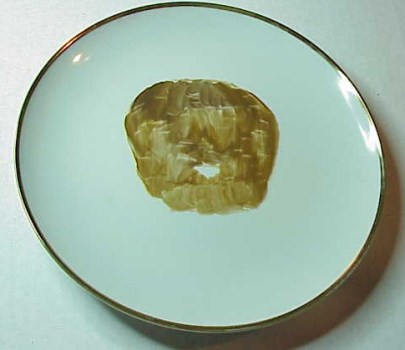
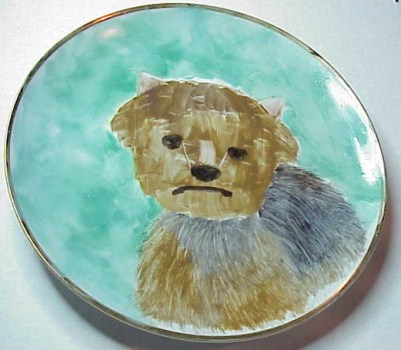
The colors I chose for this piece were a golden brown, a deep brown, black, dark grey, a salmon-y pink (and a Sevres-type green and water green for the background.)

Most of this piece is done in one fire:

Sketch out the basic head shape. ( refer to your photograph... but in this case, the basic shape is sort of an apple shape....

Lay out the placement lines for the features..... I divided the basic shape in half with the midpoint being the eye line...then divide the lower half into thirds... the middle division line is the top of the nose, the lower division line is the mouth.
Rough in basic color...the color you want to lay down is the basic color of that area. I used the two browns and also combinations of the two mixed together.... Don't worry about smoothing this....try to lay the strokes down in the direction of the flow of the hair... I left the nose unpainted at this stage.
Add on the side hair alongside the ears.... and sketch in the ears.. (Note that the outer edge of the ear lines up with the outside edge of the head...(I extended the ear line on the left side of the painting so you could see what I mean....)
Paint in the eyes with a combination of black and dark brown mixed in the brush...( I generally Don't use black alone . It tends to be harsh and also has a tendency to pop off....Adding another color to the black softens it and also gives it better adhesion.) .... The eyes are NOT very defined, as you can see... since so much of the eye is covered with hair in this breed, I didnt make the shape very distinct.... One thing to pay attention to though, is the placement of them. The spacing between them and the nose is basically triangular shaped...(Ive outlined the triangular shape to show this to you.)
Next, I painted in the back and chest areas using the browns and also the dark grey and the dark grey with a touch of black....Again, as with the face, Don't be too concerned with how this is applied... You are just looking to lay down color to work with...
This picture shows a great brush to use for hair and fur techniques...Its an inexpensive fan brush.. Normally when painting on porcelain, you look for a soft bristled brush so as not to scratch through the paint on the slick surface....but in this case, you want to have the brush make marks through the paint... so you should look for a fairly stiff-bristled fan brush...
In this photo, you can see how I trimmed the hairs on both sides of the fan brush to turn it into a square shader shape.
I painted in the nose and mouth with flat washes of dark brown mixed with a little black..( the nose is a little more black and the mouth is more brown... soften the paint in the corners of the mouth to sort of smudge them a bit )
Paint in the background of your choice. I decided on several light shades of a turquoise blue, using white and water green to soften and blend the edges...
Softly shade in the ears with a salmon-y pink ( or warm shadow if you have portrait colors).... Wipe out the ear edges....
Wipe out the bridge of the nose
For the fur effect, I pulled the brush though the wet paint... You will have to do this in layers...starting with the underlayers and working your way up to the upper layers... in other words, you'll start making your strokes a little before the outer edge of the dog, pulling the brush through the paint toward the edge and extending a little over the edge into the background....then do another series of strokes slightly past these strokes and overlapping these strokes slightly.....continue like this till you have worked through all the fur areas....
Next, go back over these fur areas with a small clean square shader, wiping out and softening hair clumps... The stroke I use rotates the square shader so that for part of the stroke, you are using the edge of the brush, then the flat of the brush,then back to the edge...this gives a narrow-wide-narrow stroke that defines the fur....
Observe the photograph and work these softening and defining strokes in the way the fur grows and falls.... You will again be working in layers, doing the underlayers first and then the fur that lays over these layers......
( Before I did the fur wipeouts long the neck area, I painted in a simple collar in blue....then I wiped the fur out over the collar.....)
Soften and blend the light area down the bridge of the nose and continue the same type of wipe out and softening strokes on the face that you did on the body...again, starting with strokes slightly before the outside edges and working into the background,then overlapping another area and then another, working the length and direction of the strokes to define the shape of the face and the flow of the fur.......
When I have most of the fur defined, I got back over it with a wipeout tool to further sharpen the fur, wiping someof the strokes over the eyes....... then I go back over it with a clean square shader to further lighten the color and define the fur....
Once Im satisfied with the look of the fur onthe face, I then use a combination of a wipeout tool and a clean square shader to wipe out the top knot...
The last step is to wipe out and define the nose.
fire to an 015 cone.
You can then add washes of color on the next fire to define and soften areas of the face and body and to add a little more color where needed.


CLICK HERE to go back to the ON-LINE LESSONS PAGE

CLICK HERE to go back to the PPIO HOME PAGE

*on-line lessons and lesson pages are the property of PPIO and the contributing artists and may not be reproduced for distribution without permission from PPIO