"Straw Hat"

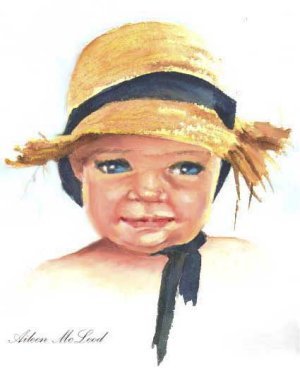
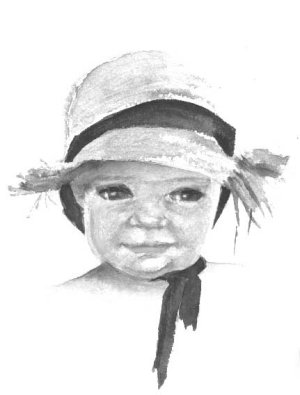
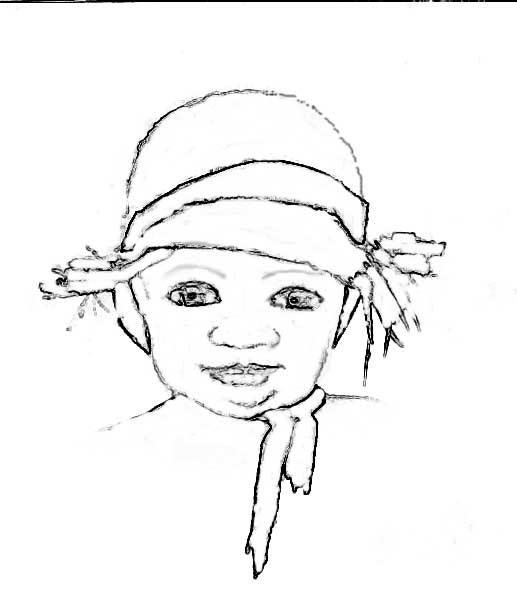
A portrait by Aileen McLeod

This is a portrait of a ‘little cutie’; I saw her at the beach and just could not resist taking a photo (my camera goes everywhere with me). She could be anybody’s child or grandchild. The tattered straw hat, squinting blue eyes and smile of self-content made an ingredient for a portrait subject. The technique applied is loose and unrestricted.

You may have favourite portrait colours, but I suggest the combination I used.
materials:- open medium, wipe-out tool, medium stippler, square shader, pointer brush, sponge and all-pencil.

CLICK HERE FOR LINE DRAWING
First fire :step 1:- sketch face, make sure the features are in proportion.
step 2:- use Sepia and pointer, establish the features. Now, with the medium stippler, block in the shadow areas, ( use the stippler with brush strokes, not stippling) soften the middle tones with a soft sponge and wipe out the highlights, use heavier pressure with the sponge, the wipe-out tool is used for the fine highlights, (take care to wipe back the reflected light, both sides of the face and under the chin.) Extend the colour into shoulder area and fade out. Block in the hat and ribbon area, wipe out the highlights in a way to represent the weave. Use the wipeout tool and cut back the shaggy strands of straw. Wipe back the light tones of the ribbon. It is important to now check the positioning of your features. FIRE; 790 C. or cone equivalent.
Sand between firings. Second fire: Step 1: paint the colour of your choice for the background.
Step 2: Trenton Ivory is used to tint the face and shoulder areas. (dab with sponge if required) Fire. 790 C.
Third fire: Step 3: The medium stippler is used to paint shadow area with Red Brown and Sepia (the brush stroke technique is used, dab and blend where required.) Pompadour is blended for the cheek colour.
Use the pointer brush to paint the mouth with Pompa plus shadow mixture for the dark areas, i.e. corners of the mouth and dividing line between the lips, nostrils and chin line. Accentuate the reflected light at the sides of face and under the chin. Paint in the eyelashes with Brown. Cobalt blue is used to paint the eyes, wipe back the lighter tone and pick out the pin-point highlight and whites of the eyes with the wipeout tool.
Step 4: Yellow is used for the hat, shaded with Hair Brown or Golden Brown accentuate the darker areas with Brown. Use a pointer brush for detail. This colour is also used to paint the eyebrows, with the pointer brush and feathery strokes. Cobalt Blue, shaded with Purple Black, is used for the ribbon; this can also be used to establish the pupil of the eye.
Step 5: Finally, wipe back the highlights on the face i.e. the tip and bridge of the nose, cheeks and chin, note the fine highlight below the bottom lip (important for the expression), top of the lip and corners of the mouth. Fire 790 C. or cone equivalent.
I really enjoyed developing this painting and hope you will too. This technique of limited blending, can be adapted to any portrait where one wants to achieve a natural look.

Happy painting, Aileen