First fire:
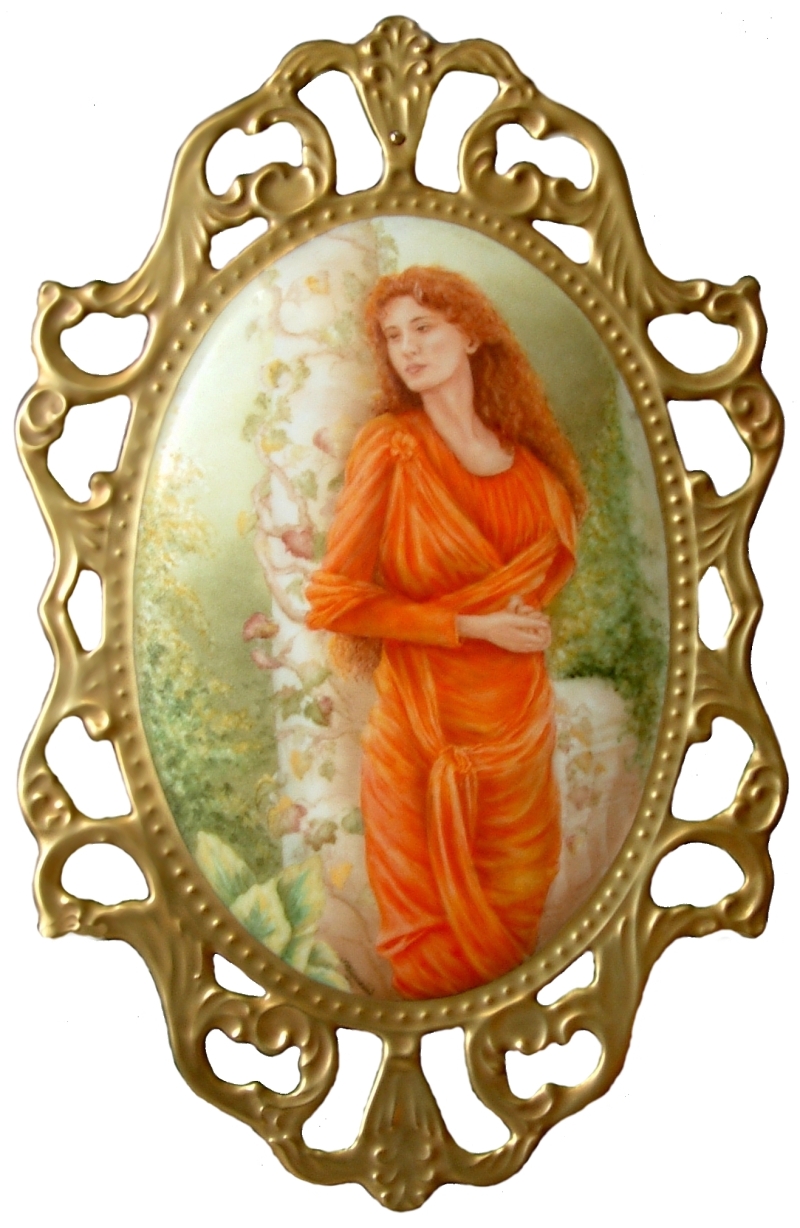
Paint the face using a very thin blend of golden ochre with a touch of portrait pompadour. Leave feature details out for this fire. If you are comfortable doing so, you can also flat wash the hand area with this colour.
If you are not, then use masking fluid very accurately over the hand area and put this colour on after putting the colour for the dress. Keep the colour very smooth and light.
Normally, I would paint with cadmium colours later on in the firing stages on a low fire, but as I was testing the cadmium colours I went ahead with the dress immediately.
With the red being the weakest of the three cadmium colours the red areas were painted much more heavily than the yellow and orange. Yellow was used for the strong highlights, orange used for the mid-tones and red for the shadow areas.
Don't let the yellow mix with the red or you will lose your depth. The shadow areas will always be a problem using cadmium colours as you can't shade them with a non-cadmium colour.
I put as much detail into the first painting of the dress as I could not knowing just how much colour I would be left with after firing.
Next, paint in the hair using red brown with mixing yellow for highlights at the top and light side. Normally I would use a flat wash of colour for the first coat on the hair using the highlight colour first.
If you wish to do this you may and then work on the detail in the next firing.
I didn't know how many firings I could get away with, so I put as much detail in as possible using a fine brush and when the colour was dry, added depth using warm brown.
Colour now needs to be added on the left side of the pillar (colour will be added to the pillar on the 2nd fire. Paint in as much foliage as possible.
Paint in the shadow of the smaller pillars on the right side using a very light brown and add some foliage here also.
You can just use light greens and yellow now and save the shadows for later.
Paint in the vine using light brown and then the vine leaves using the greens, yellows and some of the red brown used for the hair.
If you plan to gild the edge of your piece, clean that area now so you can fire the gold higher at the end and eliminate an extra firing just for gold.
Fire at 800 degrees Centigrade (sorry, I don't know what that is in cones!).( note from Marci: It is a cone 015 .... 1480 F)
Wash the smaller pillars on the right using a thin wash of warm brown – keep the effect a little fuzzy so it keeps them in the background.
The more detail you add and the sharper the lines, the more they come forward and you don't want that.
Add shadow, again with warm brown, to the bottom area and use a dark green for the leaf shadow. Give the light side of the pillar a light wash using ivory and wipe out the colour from the vines and leaves.
Now strengthen the colour of these leaves and shade the lower or shadow edges of the vines to make them look round.
Now look at the lady. I still had most of my colour after firing, but if you didn't put enough on during the first coat, you may have lost a lot. Work on correcting this now.
The yellow highlight areas shouldn't need touching, but they should be strong – if you need to add, then do so. Depending on the brand of colour you have used, you may find you need to add quite a bit to the orange mid-tones and red depths.
No problem, just carefully work on these now making sure you have plenty of folds in the fabric.
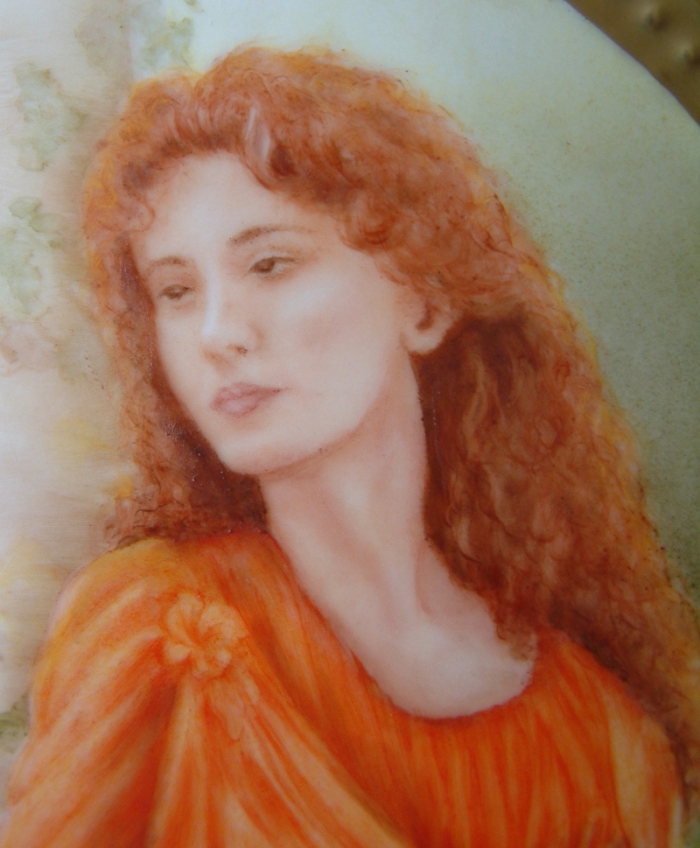
Next, using dark brown add the deep shadow areas and warm brown for the lighter shadows of the hair. Using a clean brush, wipe out hair texture where necessary.
Make sure you pull a few soft strands over the face in a couple of places. Using warm brown with a touch of pompadour, shade the neck and under the chin softly and add soft areas of the same colour to suggest cheekbones, shadow under the hair, nose shadow and a light shading under the eye.
Use a touch of pompadour to suggest the mouth and a touch of the warm brown mixture under the bottom lip. Add slightly more shading to the left side of the face in the eye area.
Using the finest brush you can (mine is about 3 hairs and fairly short for this type of work) and a thin mixture of warm and dark browns, make a soft eyebrow on the right and an even softer one on the left.
A fine line is put at the top of the eyelid – no line at all on the bottom, the shading you already have will give you the bottom line. Touch in the iris using dark brown, making sure you leave a highlight.
Form the ear with a little dab of colour. Keep everything soft and fairly light.
To paint the hands, just use warm brown in the areas of shadow and the fingers will form themselves.
Fire at 780 degrees. ( 016 cone)