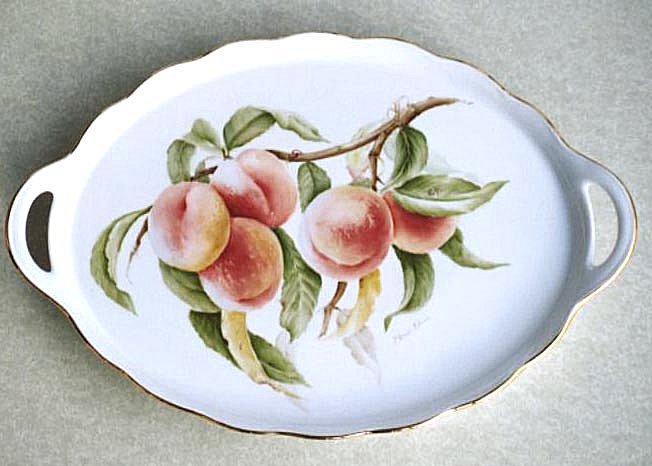
I then do a drawing that is no more than lines and circles, concentrating on the main focus. This particular piece is the large tray that you can buy at Rynne's, http://www.rynnechina.com, and the peaches are almost life-sized in the painting. 1st fire. I paint only the main focus peaches, with a yellow red softly blended to a pale orange. I gently paint the shape of the peach with a quill #8 brush keeping the highlighted areas white. My strokes will follow the shape of the fruit coming from top to bottom and curving towards the bottom.
2nd fire. With a pencil, I draw the leaves and branches, and any secondary peaches. Dipping my scroller brush into turpentine and swishing this
into a puddle with the same amount of painting medium, I will make a wet loose mixture of medium on my brush and go into a medium brown paint. With short jerky strokes I paint in the stems, keeping in mind that there are few if any straight lines in nature, and a lot of soft curves that are necessary to create the composition. These stems set up the grouping of the leaves and give the design continuity. When I paint in leaves, I usually use a light clear sap green, side loaded with a grass green or brown green for the undersides,
and a darker green for the top of the leaf.
Some of the background leaves will be painted in with a gray green and
side loaded with shading. I use approximately 10 different greens on my
palette. All my remaining firings are at 017. I paint the secondary peaches
the same way I painted the main peaches, and try to tuck them behind another
bunch or hang them down on the end of the branch.
3rd fire. Now I shade the peaches with blood red in the shadow areas. The texture is created using a wipe out tool and then gently knocking down the hard edges. Take a soft lilac color, only on the peaches in the foreground; paint a soft smudge of color in the area of reflected light. I have also found this color to be effective at the point of the brightest light as it helps to give that fuzzy look. Do not use any yellow brown at this point of painting. I now do shading on the leaves and paint in some faded background leaves with soft browns or gray greens. The stems will be shaded in darker areas and underneath the branches.
4th fire. Dark brown can be used to shade the shadows of the peaches and a very thin wash of yellow brown for the lighter areas. Remember that you are painting peaches and not glass, so a little texture is not a bad thing. I try to avoid brush strokes, but a sponge or wipeout tool works beautifully. The leaves and stems get pen and ink detail, and for the background I will often use a pale ivory, darkened by a soft warm green in the shadows.
5th fire. Deepen shading on the leaves, peaches and stems, especially where the pen detail shows up veins. I also do a wash with some yellow green on foreground leaves to give them warmth and energy. You can deepen shadows in the background again at this point. For this particular piece, I did not do a shaded background but chose instead to touch the edges of the platter with an application of European bright gold. My last fire is to cone .017
Pat Axani-Ellson