BREAKING THE RULES!
By Marci Blattenberger

(originally published in the IPAT magazine 2002)

Rules! Rules! RULES!!! Doesn't it sometimes feel like every time you pick up a paintbrush, there is another "you CAN'T do that" hangin' over your head? It's enough to drive even a seasoned porcelain artist bonkers.
I've always been a "wild child" with a tendency to do things my own way for better or worse and I've discovered that , in a LOT of cases, you CAN ignore the rules...or at least tapdance around them. A good friend of mine, Ruby Gayle Jackson who started china painting at the age of 10 in 1925, said to me: " I can do just about anything until somebody tells me that it's not supposed to work and then, sure enough, the next time around, it won't!" ( grin)

As porcelain artists, we have an extra added element (pun intended) in our work: the firing process. ( I am thoroughly convinced that there is a kiln elf who lives behind the elements and who runs out and repaints everything as soon as I close the lid.) Let's face it: china painting can be pretty unpredictable...what goes in is not necessarily what comes out.....sooooo, why not stretch the limits from time to time?
Over the next few issues, I'm going to tell you about a few rules that we porcelain artists tend to take as "gospel" and I'm going to show you a few ways that you too can tapdance!

RULE 1: FIRE at 018 : Boy, has THAT been drummed into our heads. We are so afraid of reds firing out that we become timid about firing. The truth is that since the government has mandated that our paint manufacturers lower the lead content in our paints, we need to be firing a lot hotter than we do: 015 or 014 is a nice firing range.
Try it! You will be rewarded with a shinier piece and clear, beautiful color. If you are having problems with your reds firing out at these temps, then simply re-apply them on the last fire and refire at a lower temperature. 
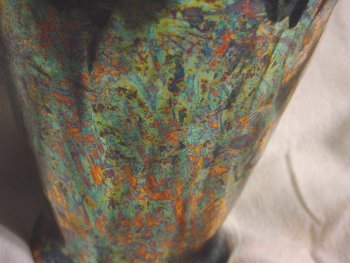
I even fire my lusters and gold at 015 (another rule broken) . I sometimes will get a different color from an 018 firing of that luster but in exchange, I get a very sturdy luster (not the "oooh-be-careful-don't touch it" delicacy we've come to expect from lusters)...and I also get a glorious shine.

RULE 2: MAKE SURE THAT THE SIZE OF THE SUBJECT FITS THE PIECE:

This is an important rule. You do need to maintain the scale of the piece... and in general, you shouldn't be thinking about painting tiny things, like forget-me-nots on a large piece like a vase. In this illustration, (SEE PHOTO OF WHITE VASE WITH THE FORGET ME NOTS ON THE LEFT) you can see how the tiny design gets lost on the large vase....Not good! ...But in the second piece, I'm going to show you one way to fit a small flower on a large piece:


Forget-me-not vase: step by step:

The trick to putting a small floral on a large vase is to balance out the small floral area with a larger motif of some sort….in the case of this vase, I balanced out the floral band with the large marbled luster band and the smaller Mardi Gras luster band at the top of the piece.

FIRST FIRE:

Mark off a horizontal line about 2/3 of the way up the base of the vase ...paint in the area below the line with Liquid bright gold. (it doesn't take as much LBGold as you would think and the effect is worth it)... Fire 015


SECOND FIRE:

Work over the area you covered with the gold with luster. I used turquoise luster (my favorite) but carmine, purple or mother of pearl (or mardi gras) are equally beautiful. I used a Q-tip (or cotton bud) to apply the luster in a swirling pattern. You have to work quickly because luster dries fast. As you apply a section of luster, crinkle a piece of plastic cling wrap and smoosh it down onto the luster (be careful to not push any of the luster onto the unpainted area of the vase. You might want to apply a resist over the unpainted area first to prevent this) Normally when I do this technique, I do the luster completely and then apply the plastic wrap but since the vase was so large and I was afraid the luster would dry before I could get the plastic wrap down, I worked in sections. I applied about a 3 inch wide area of luster on the vase and then smooshed down the plastic wrap, did the next area, smooshed down a little more plastic wrap and so on until I was finished.

When I had completed the luster, I pulled off the plastic wrap and cleaned off a few small smudges on the unpainted area. (If you used resist, then pull it off at this point.) I let the luster dry. At this point, you can fire the piece again (015) or if you are brave enough, you can continue on.
I laid down some background paint for the forget-me-nots in a band just above the luster/gold area. I used several shades of blue with the darkest blue toward the center of the motifs and going lighter as I reached the edges....I also added touches of pink and a bit of yellow....I blended the strokes lightly but left a lot of the texture of the strokes showing. Then, using a synthetic berry brush, I wiped out my forget-me-nots ....then added yellow and yellow brown to the centers. (again, at this point, you can fire the piece...015 or you can continue on)
Next, I added some Mardi Gras luster to the top portion of the vase. I worked carefully with a Q-tip, swirling the luster on (this swirling technique is especially important with Mother of Pearl or Mardi Gras lusters. If you apply these lusters in straight -line strokes, you will get a streaky, often yellow effect. By applying these lusters in a swirling pattern, you encourage the formation of beautiful patches of color that look like the colors on an oil slick.). I applied the Mardi Gras all over the top area of the vase and inside the neck of the vase, being careful to stop just a hair shy of the forget-me-not painting. I then fired the piece to 015.

THIRD FIRE:

When I pulled the piece out of the kiln, I decided that I had a little too much gold showing through the luster, so I applied another coat of the luster in the spots that I felt were a little too garish. I added a wash of dark blue over the center flowers in the motif, wiping out the petals in a few spots very lightly. I also washed some light blue and pink over different areas of the floral. Repaint the center of the flowers and add a dash of red and/or brown as an accent in the centers of some of the flowers... Accent the areas where the petals join the center of the flowers with small dots of white paint (or enamel or base for gold) and accent the edges of a few of the flowers. (Don't outline the petals completely and don't do the white accent on every petal.)
I added another coat of Mardi Gras, again making sure I swirl it on.... and then I added a thin band of Jean Beebe's structure paste at the point where the luster/gold and the floral met..I debated about doing some raised scrolling instead but the marbled luster/gold effect is so dramatic that I felt the scrolling would be too delicate. I decided on a bolder approach. Since the structure is water based, I had no problem putting it on right over the wet paint and luster. If you're working with an oil based texture powder, you will want to fire the piece first before doing this step.

Marci Blattenberger