


| Dewdrops by Ann Cline |
| It just so happened that I was looking in my storage for the original of
my book, “Berries & Fruit, My Way” a few days ago because we needed to
have some more printed. Among the storage items was a lesson on dew
drops that I thought might be helpful. The step by step photos are in
black & white because I believe that you can better see the shadows,
etc. The images of completed dew drops on fruit are in color.
Before doing a dew drop, one must first decide on how the highlights should be accomplished. The highlights on the colored, finished pieces that are shown were accomplished on the last fire by simply adding enamel. Otherwise, one must save the highlight from the bare china from the beginning. This lesson will be the enamel method which is easier. (I used the Chip-no-more enamel because I wanted to be sure it would stay put!) (All shadow color is a combination of the subject color plus black.) |
|
1. Chose a spot for the dew drop where you plan to have a darker area. On the 2nd fire, where you presumably have a light to medium wash coat, darken the area and wipe out the dewdrop shape. Add a shadow opposite the light (Usually on lower right side) |
|
2. You can do this step on the same fire but if you are a beginner, you might want to fire step 1, first. Paint an interesting shaped shadow on the inside of the dewdrop with a value between the surrounding area and the shadow cast by the dewdrop that you painted in step #1. Fire |
|
3. Add enamel for highlights. I usually make a streak of light and some kind of dot. |
|
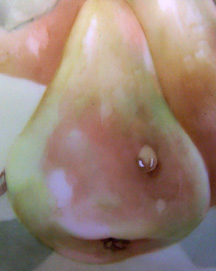
4. This shows a dewdrop on a pear. |
|
5. This shows a close up of the above dew drop |
|
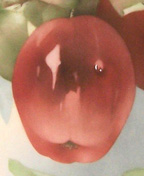
6. The shows a small dew drop on an apple. |