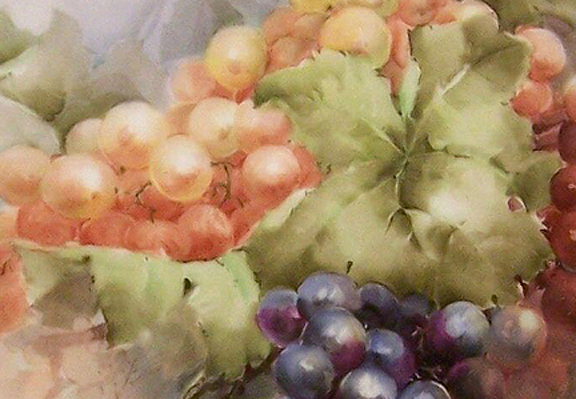
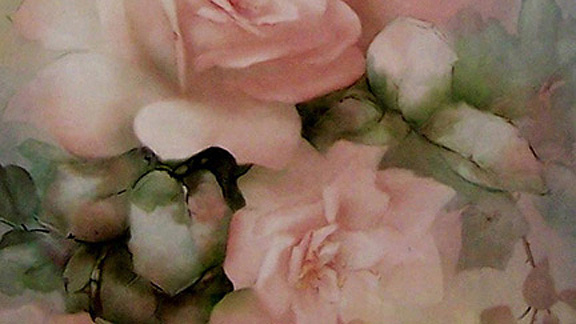
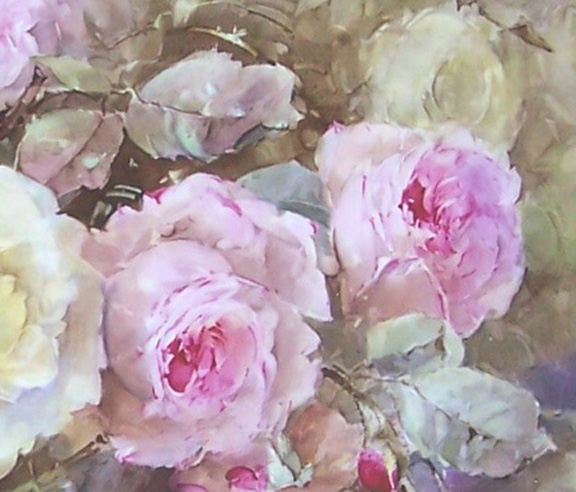
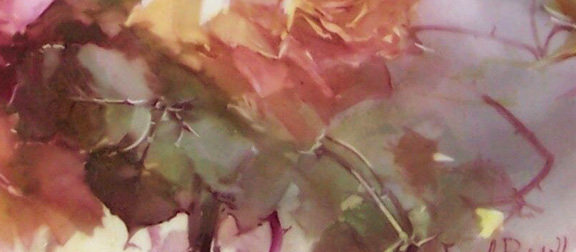
LEAVES
by Shelley Fairres and Ann Cline

This is a combination lesson on leaves consisting of a terrific email lesson sent by Shelley Fairres to PPIO and some wonderful painted examples of leaves sent by Ann Cline from various artists including Aulich and Bischoff.

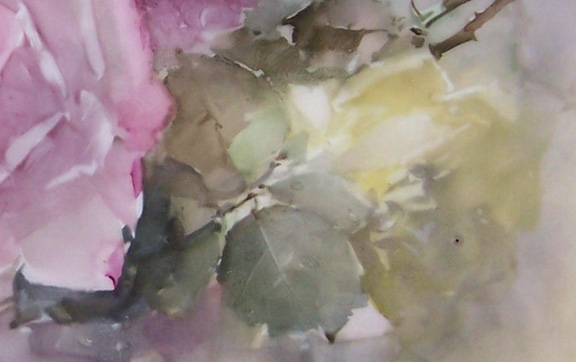
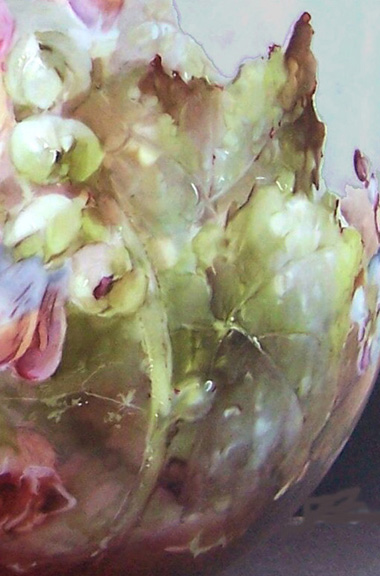
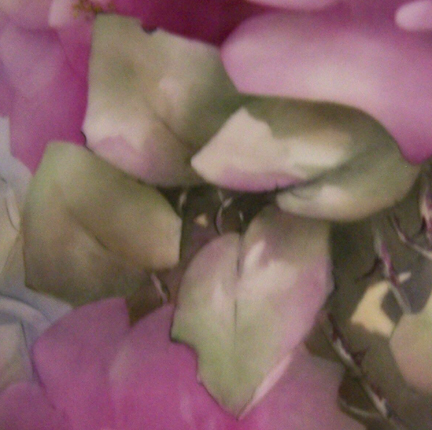
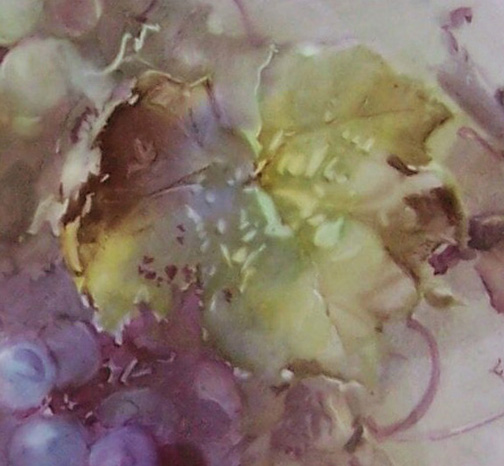
   Just thought since I haven't written anything artsy for awhile I would say a little something about painting leaves for the newcomers to our little group. Not saying I am an expert by no means but thought some basic tips might be kinda fun. If you have painted for a long time, just read for fun and feel free to critize me at any given point. That's the fun of it all. Anyway, there are as many ways to paint leaves as there are types of leaves so just about anything goes, as long as your attempt looks like a leaf or just satisfies you. Starting out, look at your subject, remember, not all flowers and fruit have rose leaves! :0).....
 

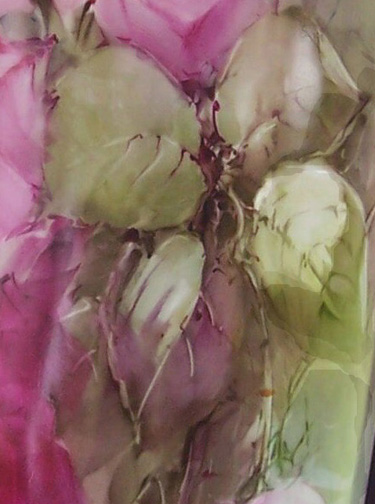
 Go out to your garden and pick some live specimens along with a flower or two. Notice how the leaves look behind the flower or fruit you have just picked, (or borrowed anonomously from your neighbor) and the structure of the flower.
You know, if they branch off from each other straight across or stagger. Sketch the leaves loosely on your china, (please note a nice tracing is a-okay with me) with a china pencil, ultra-fine Sharpie or paint on a liner brush.

Here are some colors that you can use that maybe you haven't tried yet:
1st fire: You don't always have to use chartruese or yellow green for your first fire. Try some of these colors:
cool shadow, your own grey green by mixing your lightest pink on your palette with just enough of apple green until they neutralize each other and become grey, grey for roses, (this is an older color but well worth trying on leaves for structure), celadon with a little of your own grey, and here's a real kicker, ruby.
Yep, model in your leaves or just a group of them, with ruby, but make sure that you have a lot of highlights taken out so you can wash some neat colors on top of them. Makes a great grouping of younger rose leaves that are intense in color.
Another idea is a light wash of red grape and wipe out a lot of highlights.
Have you ever tried just using portrait colors? They are soft and Rembrandt brown, cool shadow, tender shadow are neat ones to try. If you are doing a fall motiff, try hair brown, with lots of highlights taken out. There are so many choices, like violet of iron that has the bluish cast, and blue violet as well.

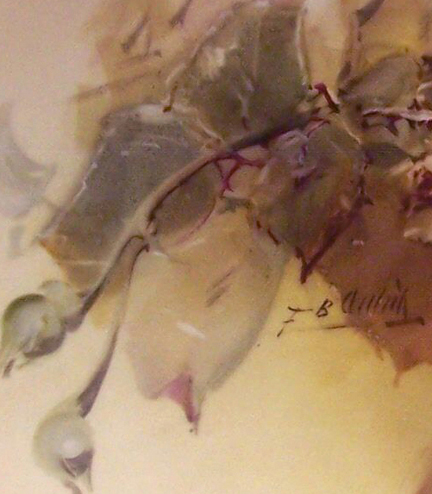
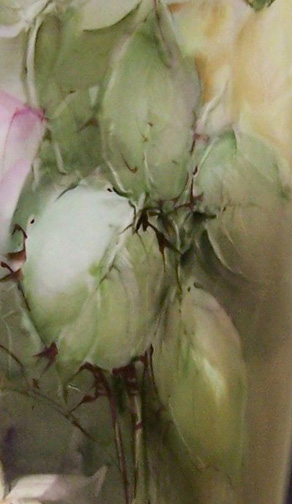
2nd fire: If you want to have fun, the second fire is for you. If you accomplished your goal on the first fire and have soft leaves with plenty of highlights, the rest is gravy!
You can wash a variety of colors over your first fire and shade with appropriate colors. Let's say that you choice a gray cast for your first fire, and you see it is really soft with not much definition, use your same gray and side load with a dark green or a blue violet and shade. Then give a soft wash of gray green over the remainder, lifting off a few highlight on the light side with a clean oiled brush.
You might want a light wash of yellow over your leaf that is on in the sunshine, or a nice chartruese. At any rate, you are just shading where the leaf attaches to the stem and a little on the darker side of your middle stem line.

3rd fire: Give another wash of your color of choice and now you get to get creative. With your flat shader or an angular brush will do just fine, at a 45 degree angle, paint your bottom edges, anywhere a tear might be in the leaf with some of these neat combinations:
If you have a leaf that is on the cool side, use your deepest purple, a touch of ruby and dark green, this is a triple load, and paint a bit on the tips. Now, don't make a skinny line, that's not very pretty, lay in your color to make the edge a bit sharp but leaves a gradual trailing of color toward the middle.
In other words, angle your brush, putting the most pressure on the tip of the leaf but still having the full width of your brush on the surface.
Don't leave it that way. The color that is in the interior of the leaf do this: press your brush out till it is dry, don't wash, just put in a little oil and lightly soften where it is a gradual loss of color from your tip.
You can pull out some highlights on this with a clean brush. If you use a wipe out tool, remember to soften. You don't want a big ridge of paint build up.

Any way, this is a start, have fun, paint a leaf or two and try new things.

As always,
Shelley A. Fairres