|
While washing the plate in hot soapy water, look for flaws in the china. This will prepare you to work flaws into design or, at least be aware of them. The back of this particular plate has holes to put wire through for hanging on the wall. Place arrows on the front of the plate marking the top and bottom with a marking pen that will burn off during the firing. At the same time check for a glued on label and pull it off.
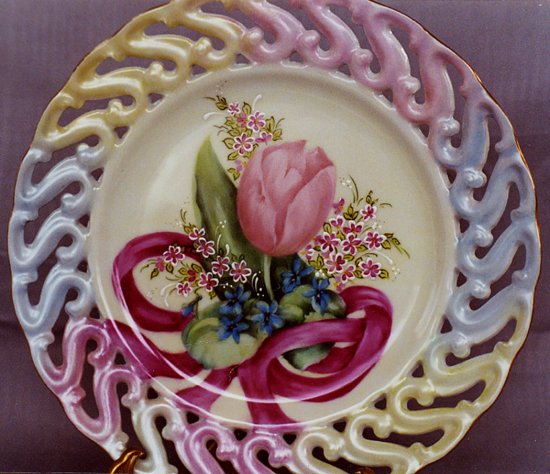
The little violets/johnny jump ups and small 'fantasy flowers' are for accent. You might say the smaller flowers are used for lines of direction and to create movement within the design. Have the ribbon turn, twist go over and under subjects for interest. The ribbon will tie it all together, and hold (anchor) the design to the plate instead of floating.
Trace this design if you must, but it will truly be your design if you use this picture as a guide line. If you prefer to trace, just trace the tulip and violets. Freehand the little fantasy flowers & leaves.
To get the colors you want, pastel, bold and intense, or grayed know your colors before you start. If you are unfamiliar with a color and do not know how it will hold up in a hot fire, test fire on porcelain with the mixing and painting medium you will be using. Fire hot, or at least the temperature you will be firing plate. I can not stress the advantages of test firing colors enough! It sure will prevent grief if colors are not what you are striving for after firing.
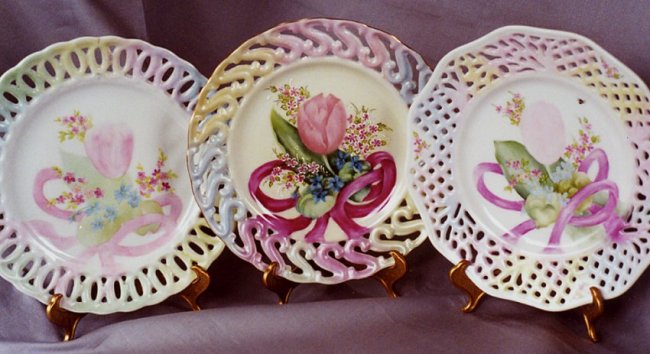
This was painted with more than one firing in mind from light to darker
values.
I will be referring to the colors used in photo. By all means use a color scheme which pleases your eye. If I try to use a color that I don't particularly like, I'm usually disappointed with the final results
Suggested colors are: light to medium value pink/rose, dark ruby, light and medium value green, brown green, mixing yellow, and light medium value blue, violet/purple, black, red.
Do as many 1st firings/paintings as you need. Before firing always check for smudges and clean them off, especially on the back of you plate/tile.
1st fire:
Start with the leaves by covering with a full flat brush load of light
value green. Don't worry about highlights at this point. Paint the tulip
with a full flat brush load of your light value pink. Use a light value
pink for the ribbon; full coverage. Carefully go under and over the leaves
with ribbon. With a wipe out tool or a clean brush wipe out violets and
fantasy flowers that will be on top of leaves. Refer to your own drawing
or look at photo for placements.
If wipe outs do not work for you, forget painting the leaves and ribbon this fire. Paint in the smaller flowers (fantasy & violets) with selected light values and keep in mind that there will be leaves behind. Fire at this point hot 016. For the 2nd 1st fire, paint in the leaves and ribbon, be sure to wipe the green paint from the flowers and fire 016.
2nd fire
At this time decide where the light source is coming from. Draw arrows on plate for a reminder, say from upper hand left towards right bottom. Keep in mind where all the shadows are, where the highlights are and model the leaves with medium values of green. If you have lost the leaves shape, draw over leaves with a marking pencil so that you will recognize the shapes more clearly. There are two violet leaves and one tulip leaf. Do not go too dark with color, this can be done with other firings. Go easy! Model the ribbon with a darker color, fully enhancing the twists and turns. Wipe out for the tulip stem to the light value green receding between the leaves.
Leave the tulip for last fire! This ensures the tulip will be the focal flower as it does not like competition from other subjects
Make note that when the same color is used over the same color on a subsequent fire, the color doesn't darken. The color is heavier. For value, darken the color with black or use a darker hue. Without good values painting will look uninteresting, flat and just plain boring. No matter how good composition is, poor color values will pop out at the viewer and yawn.
Model the violets with darker value blue or violet or purple shades. Add a touch of mixing yellow to the centers. Mix the dark petal color with black on a liner brush and put the detail in around the center of violets faces.
Take your time with this, fire at any point. Take as may 2nd firings as needed.
If you have not painted in the fantasy flowers, now is the time. Add light
value pink in the places you have wiped out in the leaves. Add the little
flowers that will come from behind the tulip and ribbon. Refer to your
drawing or photo. Put mixing yellow for the center of little flower Add
some leaves with the light value green. You will attach stems, leaves,
and flowers on the next fire.
A note to remember is the most common mistake a china painter makes (beginner
to advanced) is in the values. Value = is the relative lightness or darkness
of a color. For a starter, use 3, light medium & dark. Another note to
make is, remember that the highest highlight on a subject has no detail
as in the place furthest from the highlighted area no detail is seen.
Apply the detail somewhere in the middle value. If you look closely on
the 2nd fire photo, in the upper hand right there is a black splat. There
was a flaw in the china, so I covered it up with a bumble bee. If your
plate has a annoying flaw, paint a butterfly, fly or any related subject.
3rd fire
Add more shadows and detail to leaves if needed keeping the light areas (highlights). Look closely at the values to see that there are at least 3. Apply a wash of mixing yellow over the top violet leaf and the tip of tulip leaf. Darken where needed to the violets and place a red dot in the centers over mixing yellow.
Use a pen with medium value green paint or a liner brush to connect the little fantasy flowers with their stems and leaves. Outline the little leaves for color value. With a dark rose or dark ruby color apply over one or two of the petals of each fantasy flowers for value.
Scrutinize the values in ribbon; darken wherever and if needed.
Now for the tulip. With a marking pen/pencil separate the petals. Look at other pictures of tulips to see how the petals are formed. The colors I used for this painting of tulip was "pretty pink" a light value for 1st firing and "raspberry pink" for the 2nd firing which has a bit of brown twinge to it. This was my choice after seeing test firings.
Do not let the tulip get too dark. Apply the darker color in specific places so that it models the flower. Leave much of the 1st firing pink showing.
At this time, if warranted, finish off the rim of plate with a wash of colors used in composition.
fire 016
Do the finishing touches with color values. Just to give a bit of fru-fru,
I outlined fantasy flowers with "base for raised gold" and where a little
direction was needed I added a scroll or two. Around the rim of plate
finger on liquid bright gold. Fire 017
|