You need three new pencils with flat eraser tops
- an exacto or utility knife
- root canal tools * (got them from my dentist)
- tile
- yellow red, pink and blue paints (medium shades)
- painting oil
- brushes
- wipe out tool (to help with those extra cuts)
*Note -Hubby made a holder putting them in 2” piece of 1/4”
dowel
Prepare Pencils: Think of the clock face
and with a pen or pencil, draw the patterns.
Patterns to be cut into the eraser tops as follows for these flowers:
Baby Roses: draw line in center (
12 o'clock to 6) .
Violets: make an X ( 10 o'clock to
4 ) and ( 8 o'clock to 2) next line goes from 12 o’clock to where
the X meets.
( Five- pointed Star )
Forget-me-nots : same as for violets
only drill in center with root canal tool 1/8” deep around in center.
( Five-pointed Star with hole in middle )
Score all LINES with knife halfway into eraser - using root canal tool,
clean trench 1/8” wide. Put “X“ with marker on pencil to
guide you when turning in different directions for flower placements.
You will use a tile as your stamp pad.
- Put a smooth application of paint on tile, press eraser firmly in
color, bring straight up.
PRACTICE ON A TILE TO GET THE FEEL OF USING YOUR STAMP BEFORE WORKING
ON
MAGNETS, JEWELRY, AND SMALL CHINA ITEMS.
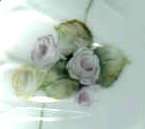
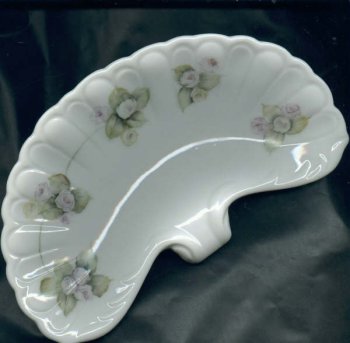
Roses : Press eraser on color, lift.
On your piece, press, move right and left and lift. You can walk the eraser
down while moving R & L to make more petals. Wipe out cuts, add paint
where needed, add leaves and you’ll have a rose.
Violets: Press eraser on color, lift.
On your piece, press, move slightly left and then right, lift. You’ll
have to play with this flower as the stamp is only your placement guide.
Forget-me-nots: Press eraser on
color, lift. On your piece, press and repeat as often as you like. To
finish off the flower, use yellow red for the fine lines.
Practice Practice Practice |